Showing posts with label DIY. Show all posts

Sunday, February 25, 2018

new worktable

Since the beginning of the year I have been using my dining room table for both sewing and collage-paint-ink experiments, as well as for eating meals. It finally became obvious that it wasn't a good situation. The table would become cluttered with all my art supplies and boxes of clippings and I would have to clear away everything so I could spread out my sewing things. Then I would have to clear away the sewing things before I ate. So that was one thing.

The other thing was that working on my sewing projects was taking a toll on my back. I would spend hours bending over a too-low table and have to suffer with a painfully stiff back for several days before I could get back to work. Then it was a vicious cycle of more bending, more stiffness, more delay.


I had seen some folks online who had made workspaces with some 36 inch tall cubicle storage units and that seemed like something I could put together quickly. I still had two old 24x80" doors I removed from a closet and I thought they might make a good table top. The doors are temporarily held in place with a couple of clamps, but I'll screw them to the storage units once I figure out the table's permanent location.


Monday, December 25, 2017

makeshift work space


A longer shot of my counter top in the sewing room. The hole for the sink has been cut out and the new sink is the white thing on the floor. Back in the corner are the Wilsonart boxes the laminate came in. They are almost as tall as I am.

I didn't intend to be working on this project over the winter. I have been researching how-tos and collecting laminate samples for more than a year and planned to start the project next spring. It was hard to find a pattern I liked. I finally settled on a geometric retro pattern called Betty, an off-white ground with patches of aqua and pale orange. When Wilsonart announced they would be discontinuing the pattern December 1 I was forced to take action an buy the laminate in November. I had to special order the long piece for this counter.  I was told I got the last large piece of laminate they had; that it was already out of production.

I knew I wouldn't be able to store the laminate for long. It's not very thick and tends to expand & contract with changes in temperature & humidity. I started building the countertops, so I could get the laminate glued down and not have to worry about it getting bent out of shape. Wilsonart recommends particleboard as the substrate for the counter. I don't like particleboard, but its expansion-contraction rate is more similar to laminate than plywood is, so that's what I used.

I'm sealing the particleboard around the sink area with oil-based fast-drying polyurethane in the hope it will prevent damage in case there is a water leak in the future. All the cabinets in my house were made of particleboard and and the area under my kitchen sink has already been subjected to water over the last 30 years. It's no longer flat and parts of the surface have disintegrated. The same goes for the area under the bathroom sink. I hope to have some polyurethane left over to seal those areas, and then I may try to cover them with leftover laminate. I tested the poly on some scrap particleboard and it does seem to repel water, at least in the short run. I apply it with a foam brush, wait a few hours and apply another coat. The underside is done and I'm working on the top side now. I may be unboxing the laminate in a few days.

Sunday, December 24, 2017

weird Santa

One of the oddest depictions of Santa Claus I've seen.

It's appropriate, I reckon, since I'm probably having an odd Christmas compared to many folks. No children here and most of my family are a thousand miles away. It's just me and the dog.

The thermometer says 50 degrees F. but the wind is howling from the north at 25mph, so it feels closer to freezing, at least to me. It's a good day to hunker down indoors with a cup of hot coffee and some freshly baked cookies.

Instead of Christmas, I'm celebrating some accomplishments of the past year, and I'm looking forward to finishing some big projects during the new year. The last few days I've been deleting many old files from my computer desktop and organizing the ones I'm keeping. It can be hard to find something when you know it's in "Today's Stuff", but that folder contains a "This Week" folder, and that contains a "Files Accessed Today" folder, and at least a couple hundred files are only labeled "Screen Shot" or "some weird number downloaded from some website somewhere".


This is a detail of an 8 foot long kitchen countertop I hope to finish within the next month or so. I brought the unfinished counter in from the garage and it's now in my sewing room. Everything needs to remain above 50-60 degrees for a specified time during the laminating process and there was too much fluctuation outside. Also it's no fun working in an unheated garage. Needless to say, all progress on my latest quilt has stopped. All my sewing stuff is covered in sheets to prevent the accumulation of sawdust and other debris from working on the counter. There's barely room for me to move around anyway. I removed these clamps today and have begun sealing the area where the sink will go. More on this later.

Monday, November 6, 2017

patio table


I signed up for Steve Ramsey's online woodworking course called The Weekend Woodworker, and this little patio table is the first project. I'm totally amazed that I made this and that it literally took one weekend. I'm so looking forward to the next project.

Friday, October 27, 2017

new toy

 
Yes, it's a Table Saw! I've been wanting one for several years for DIY projects around the house. I have a handheld circular saw, which is fine for some things, but it gets awfully tedious when you have to cut a number of pieces to the same size (kind of like quilting). I have to mark each board, then clamp a straight edge guide to the board, then secure the board with more clamps to a work table, then saw, then undo all the clamps and repeat. With a table saw I should be able to set the guides on the table and then slide each board through the blade and out the other side.


Before I could start learning how to use the saw I had to build a table to secure the saw at the same level as my work table. I wanted it to be mobile, so I could roll it into a corner of the garage when not in use, which meant adding casters. I built most of the table in a day, and spent another few days back and forth to the big box store to replace a board I messed up and to find hardware to actually secure the saw. The whole time I was sawing boards I kept thinking "this would be so much easier with a table saw." I spent another day attaching miscellaneous saw parts, and learning how to undo and redo different things. Today I'm finally going to plug in the saw and see if it actually works.

Wednesday, January 25, 2017

how i spent my summer vacation

.....and all of autumn on in to early winter.


Last year I had the sad duty of moving my 87-year-old mother into a facility for dementia patients. She had lived with me for about 15 years, so I had to get used to her not being in the house. About the same time my 15-year-old dog died, so I had a lot of sadness to deal with.


Life goes on. I adopted a rescued dog and began renovating my mom's old room.

Mom's messy & dark room

I knew I wanted to remove the wallpaper border and paint the room a lighter color. My new puppy also had some accidents on the carpet, which seemed to activate the smell of every previous accident from the previous dogs who lived here. No amount of baking soda, vinegar or Nature's Miracle could get rid of the entire smell. The carpet and padding had to be removed and trashed. I decided I wouldn't replace the carpet; instead I would use an acid stain to add color to the concrete floor and I hoped it would be easier to keep clean.

I watched a lot of videos on You Tube, and staining looked pretty easy. It's the preparation that's murder.


THIS IS MY FLOOR LAUGHING AT ME

I won't go into all the problems I had with my floor. I did learn more about concrete than I ever expected to know. I repaired the holes from the carpet's tack strips and hairline cracks from aging. I sanded off a lot of 35-year-old old joint compound and paint spatter, but I couldn't remove the stains from the old carpet glue. I ended up resurfacing the floor with a concrete and a pool trowel. The floor didn't come out as I expected, but I think it looks pretty nice. I wanted it to look like stone or rocks.


While I wasn't working on the floor I removed the wallpaper border, repaired holes in the wall, and primed and painted it. I replaced the very low-hanging ceiling fan with a smaller but brighter ceiling light fixture. I removed all the baseboards and door molding and repaired and repainted it. I have arthritis in my back and hands so I could only do a limited amount of work each day. I was constantly reminding myself of Lao Tzu's proverb that "the thousand mile journey begins with a single step." It took almost five months to complete most of the work, but today I have a new craft and sewing room. The tiny room that was my combination office-studio-junk collector is now becoming an efficient place for doing "office" stuff like scanning and organizing my genealogical research.


I still need to sort through all the shoe boxes on the shelves and make some curtains. For now I'm using Mom's old card table as a work surface.

Saturday, August 13, 2016

Reupholstery Project

I've had four of these dining chairs for about 20 years, and I decided it was time to change their look. I found some upholstery fabric, watched a lot of videos on YouTube, and dove into my first reupholstery project. After removing the fabric from the first chair I knew I was right about change: the old fabric was so dark and filthy when compared to the original color. You couldn't tell so much when it was still on the chair.


I used a manual stapler to attach the new fabric to the seat, which is made of particleboard.  I have some arthritis in my hands and sometimes had to use both hands to pull the lever on the stapler. It's not easy to hold the fabric in position if you need two hands to staple! I also had to allow a day or two between stapling sessions for my hands to recover. I felt it was worth all the trouble after I got the chairs put back together.

Here's one of the finished chairs. I love the new fabric; it's called "Jungle Jam". It's like getting a whole new set of chairs.

If I do another upholstery project in the future I think I will buy a pneumatic stapler. So much easier on the hands, and faster, too.


Wednesday, January 20, 2016

noxious & toxic

"You could paint a meatball if you painted it with Zinsser first." 
quote found on painting forums, attributed to "an old painter."

Here are the utility shelves with a first coat of primer (the bottom two anyhow). The light is different because I changed the ceiling fixture. When I changed the light bulb a few weeks back I noticed some burn marks on the ceiling and discovered the wires inside the fixture were also a bit crispy. Not good! Probably someone used a high wattage bulb in the 60 watt fixture. I found a new fixture on a closeout sale at Wayfair for $1.06 and snapped it up. It uses two bulbs instead of one for more light. Yay!

The shelves are looking pretty good already. I can barely see the places I patched. I am using Zinsser B.I.N. Primer, the shellac-based product that is the subject of the quote at the top of the page.


Two reasons I chose this primer were a) it has great adhesion without having to sand the surface and b) it blocks stains and prevents wood tannin from seeping through. I'm hoping to eventually paint the stained wood and particle board cabinets and the wood paneled wall in my kitchen, and this seems to be the most appropriate product. It was either this or an oil-based product.

I'm using a 4" wide high density foam roller for the flat surfaces inside the cabinet, and a 2 1/2" synthetic bristle angle brush for the corners. The primer is so thin it's almost like painting with water, so it takes some getting used to.

Now for the "noxious & toxic" part.

B.I.N.  isn't low VOC. According to The Fun Times Guide this stuff has 550 grams per liter of volatile organic compounds compared to about 100 g/l for a low VOC Valspar primer. Because it's high VOC it stinks to high heaven. I wear gloves, goggles and a respirator whenever I open the can.

Cleanup is also noxious. You can use denatured alcohol or ammonia. Ammonia's a lot cheaper so that's what I use. I make a solution of half ammonia and half water and add a few drops of dishwashing detergent. I have used this formula with good results on both my brush and roller. After using the ammonia solution I rinse them in water.

More experiments await.

Monday, January 18, 2016

me and my Arrow

I put a coat of primer on 2/3 of the shelves in the utility room. It's too cold and humid to paint today, so I'm on another project.

It's been two years since I removed all the doors and drawers from my bathroom. I'd meant to re-paint them and re-install them with new hardware, but they've been sitting in the garage all this time. The bathroom cabinets, like the ones in my utility room, had had latex paint applied directly over oil paint, and it wasn't long before the paint started peeling off. This drawer seemed to be the worst of the bunch and was what instigated the cabinet makeover.

I thought it would be a quick job to remove that layer of latex, but it wasn't. I tried using the orbital sander, but it took off too much of the finish, down to the bare wood in places. Sanding by hand seemed way too slow and time-consuming, and I wasn't getting anywhere, so I quit.

Lately though, while removing a wallpaper border, I found my five-in-one tool did a great job of sliding under and lifting the wallpaper off the wall. Today I laid  dropcloth in the living room, brought a few drawers inside, and started scraping. In many places the layer of latex peeled off in strips; in other places it took lots of scraping. Scrape, scrape, scrape. It's a good exercise in persistence.  And me and my five-in-one tool are getting to be friends.

The most time consuming part is cleaning paint out of the routed grooves that border each piece. I am folding 80 grit sandpaper into narrow two inch lengths to slide in the grooves. It's not a big deal I guess, since these doors aren't made of particularly good wood, but I want to save some of the house's original handiwork. I think I have eight more pieces to do. If I can finish one every other day I should be done in just over two weeks.

Friday, January 15, 2016

winter ventures

I've been working on some house updates since the great outdoors has been a bit chilly. First on the agenda was the utility room.


There's nothing really wrong with this room except it's dark and the cabinets don't work for me. Before they put this house up for sale the previous owners painted all the non-paneled and non-papered walls in the house this dark griegy-mauve and all the trim a bright white. The paint was good for a temporary spruce-up, but because they put latex paint directly over oil paint it wasn't long before the paint started peeling off, mainly on the cabinet doors.

 I removed the cabinet doors and installed a brighter light bulb. The room felt so much better I decided the doors were not coming back. Great paint job, eh? They just slapped the paint on without even removing the doors. I spent hours cleaning paint off the hinges from the bathroom cabinets; I was so glad I wouldn't have to repeat the process here.


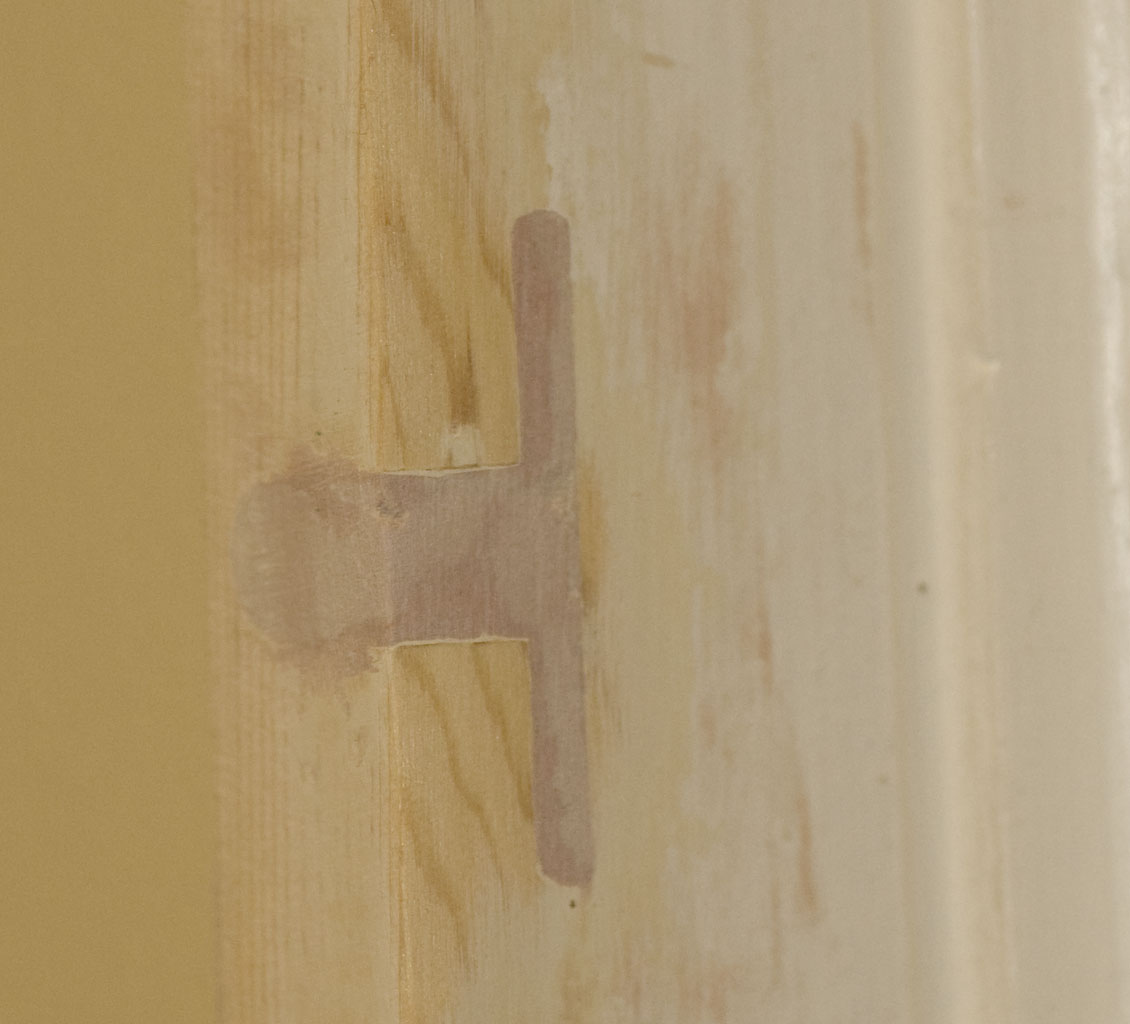
First step was going to be filling the cracks at the back of the cabinets and all the holes where the hinges were. That's what I've been working on for the last few weeks. I experimented with a couple of wood fillers and wasn't happy with the results, so I finally settled on Bondo, a quick-drying two-part resin usually used in auto repair.

I had to get some kneepads, because it didn't take more than a minute of kneeling on top of the washer or dryer for my knees to start yelling at me.

I have arthritis, so I can only kneel and reach for a short time, but every little bit of work adds up. Every day I'd tape off all those holes with masking tape, mix up some Bondo, and jam it into those holes.  Then I'd peel off the tape and let it cure. It's extra work to tape off, but it minimizes sanding time later. It's great that Bondo hardens so quickly, but it also means you only have about 4 or 5 minutes of working time. You also need to wear a respirator when sanding this stuff. Bondo smells pretty bad, and it takes a few days for the smell to dissipate, so it doesn't take long before I get tired of the smell and stop the whole process while I work on something else.

These two videos helped me tremendously with Bondo:
How to repair a crack in wood using Auto Bondo
DIY - Repair a door with Bondo Auto Body Filler  - This one is long, but shows the patience required to layer the Bondo on deep repairs.

I used putty knives to apply the Bondo and found old plastic cards (such as credit cards) worked well to scrape the material off the blades of the knives. I wear disposible vinyl gloves when mixing and applying Bondo because I tend to make a mess when I'm working. This case was no exception.

Look at that! Nearly done!


Monday, May 11, 2015

Pretty Maids in a Row


I had these old plastic flower pots that I wanted to spruce up with spray paint. They're in good shape except for some staining & pitting and the grey doesn't blend well with my living room. I set the pots  on some sticks in the back yard (it's just too smelly of a job to do even in the garage) and the old nursery rhyme "Mary Mary quite contrary" suddenly came to mind. The last line goes "with silver bells and cockle shells and pretty maids all in a row." I'm sure I had that nursery rhyme read to me many times as a child. I remembered that many of those old English rhymes are euphemisms for much darker stories so I did a quick search and found this and this. Oh yeah they do look like beheading victims, don't they? Off with their heads!


I used Rust-oleum Painter's Touch 2X paint in Satin Espresso. Rust-oleum makes some lighter shades of brown, which I would have preferred, but this was all that was available at my local Big Box store. It's dark, but the color will still look nice in the living room when I bring plants in for the winter. A single coat covered the pots really well, although I missed a few spots around the rims. The paint stuck to the plastic really well, too. The smell is pretty strong. I could still smell paint after the pots stayed outside for 24 hours. I'll touch up the rims and by the time winter rolls around the paint smell should be gone. Except for some cracks on the bottom of the pots they look brand new!

Sunday, October 26, 2014

new weapon of choice


Yee-haw this is my new toy, a 12-Volt Bosch impact driver. Its sole purpose is to insert & remove screws. I call it my Miracle Tool. (yes I know my fingernails are dirty.)

I've always had a hard time working with screws. My hands and arms aren't usually strong enough to get a screw properly tightened down with a regular screwdriver. I have a power drill that I have used for screws but again, I'm not strong enough to keep the bit firmly in the screw head. I end up stripping the head, making it useless. I may get it screwed in place, but I will never be able to remove it.

Last December I had to remove a row of screws from the underside of the top of a closet-door frame. I had to stand on a stool, reach up with both hands, and bend my head back to see. Because of the awkward position & the weight of the drill I ended up severely pinching a nerve in my neck. It took more than 6 months to recover most of the use of my shoulder. I decided it was time for a good power tool.

This impact driver weighs only 2.13 pounds and I only need one hand to use it. I looked at a lot of drivers and this is one of the lightest if not the lightest, but it's got plenty of torque. I can put in a screw & then remove it in one fell swoop. I was able to remove 12 tight screws holding some door hinges in under 5 minutes. The Miracle Tool has made my life so much easier I've decided to tackle some real woodworking projects.

Ta-dah. Oh, I know, it's just a box frame. It's for a raised garden bed. It's made of four pressure-treated 2x10" boards with three 2-1/2" deck screws at each corner. While I did make pilot holes for the screws I probably could have got by without them. When the screw's path gets sluggish in the wood, the impact driver turns into a "mini jackhammer" to MAKE that screw go in, and all I have to do is hold it in my dainty little hand. Thank you, Bosch, for making a tool a Girl can use!